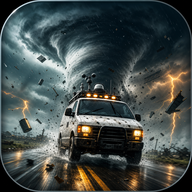
The Ultimate Funnel Runners Guide: How to Survive the Storm and Escape
Master the storm with our ultimate Funnel Runners guide. Learn van repair strategies, hazard management, item locations, and multiplayer tips.
Surviving an EF5 tornado with nothing but a broken-down van and a chaotic team of friends is no easy feat, which is why a comprehensive Funnel Runners guide is essential for your survival. In this cooperative survival game, players must work together to loot, repair their escape vehicle, and outrun devastating storms before they are swept away. Whether you are playing solo or with a full crew of seven, this ultimate Funnel Runners guide will walk you through every mechanic, hazard, and strategy you need to conquer the storm.
Before diving into the mechanics, make sure you have the latest version of Funnel Runners on Steam to experience these features firsthand. Understanding the delicate balance between high-speed looting and weather-tracking is the key to escaping each match alive. Let's break down the systems that govern this high-stakes survival sandbox.
Understanding the Storm: Tornado and Destruction Mechanics
The tornado is not just a visual backdrop; it serves as the match timer, the primary environmental threat, and the core mechanic of the entire game. Rather than simulating complex wind physics that would degrade hardware performance, the developers designed a highly optimized simulation system. As detailed in this Funnel Runners guide, the game engine uses intelligent data manipulation to create a convincing illusion of environmental destruction.
When a tornado spawns, the game rolls several randomized parameters:
- Intensity: Ranging from a minor F1 to a catastrophic F5.
- Area of Effect: The physical radius of the storm's destructive winds.
- Maximum Wind Speed: Determines how quickly objects are torn apart.
- Travel Path: The route the storm takes through the map, which can dynamically shift.
The destruction system operates on an object-by-object threshold. When a structure enters the active zone of a tornado, the game compares the current wind speed against that asset's resistance. If the wind wins, a dust effect plays, custom debris particles spawn, and the asset swaps to a pre-made "broken" state or despawns entirely.
To achieve this without tanking frame rates, the developers built the world out of over 100 modular, interlocking "LEGO-like" pieces. This clever design choice allows mid-range and low-end computers to render the simultaneous destruction of over 100 assets seamlessly.
The Van: Your Mobile Base and Escape Route
Every run in Funnel Runners starts and ends at your van. While it spends the majority of the match completely broken down, it is your only ticket out of the disaster zone. The van is divided into three distinct functional systems: Problems, Useful Equipment, and Upgrades.
To escape, your team must diagnose and resolve all of the van's mechanical issues within the 20-minute time limit. However, these problems often cascade; for example, a dead battery will lock you out of the van's electrical diagnostics, meaning you cannot fix fuses or fuel lines until the power is restored.
Aside from being a mechanical puzzle, the van serves as your command center. Inside, you will find a surveillance monitor that cycles through your teammates' body cameras (each player wears a numbered vest for easy identification). There is also a radar system that predicts incoming weather patterns and tracks player locations. If a teammate dies, their icon on the radar turns into a warning red dot, allowing you to locate their body and retrieve their dropped gear.
Tools, Gadgets, and Consumables: Loot Categorization
Looting is the lifeblood of your survival strategy. Because item spawns and container contents are completely randomized on every single run, memorizing fixed loot routes is useless. Instead, this Funnel Runners guide categorizes all items into four distinct pools so you can prioritize what to carry.
[Loot Pool]
  ├── Tools (Priority: High) ── Tires, Fuses, Batteries, Jacks
  ├── Gadgets (Priority: Medium) ── Umbrellas, Crowbars, Defibrillators
  ├── Consumables (Priority: Low) ── Meds, Bandages, Energy Drinks
  └── Collectibles (Priority: Optional) ── Tapes, Documents, Newspapers
Status Effects: The Moodlets System Explained
To survive the harsh environment, you must monitor your character's physiological state. The game communicates these states via "Moodlets"—visual icons on your HUD that fall into two categories: Temporary (which decay over a visible timer) and Timeless (which persist until you actively resolve the underlying cause).
To keep your character running at peak efficiency, use this Funnel Runners guide status table to identify and counter various debuffs.
Progression and Vending Machine Unlocks
As you complete runs and secure extractions, you will earn experience points and Apex tokens. These tokens can be spent at the vending machine located inside the van to purchase advanced survival gear. However, these high-tier gadgets are locked behind your overall profile level.
The Level 50 Pocket Radar is widely considered a game-changer by the community. When activated, it highlights mission-critical repair parts in a bright blue silhouette, while standard utility loot and consumables appear in green. This completely eliminates the guesswork during late-game looting runs when the storm is closing in.
Step-by-Step Beginner Strategy Walkthrough
Navigating your first few matches can be overwhelming. To help you find your footing, follow this phase-by-phase Funnel Runners guide strategy designed to maximize your efficiency and survival rate.
Phase 1: The Pre-Match Diagnostic
Before running off into the suburbs, you must gather information. Have one player step inside the van and insert the key into the ignition. This action populates the van's diagnostic screen, showing you exactly which parts are broken.
Next, check the mission board to see what secondary objectives are active. Completing these side tasks is not mandatory for escape, but community testing shows that neglecting a single secondary objective can cost your team up to 400 XP on higher difficulties. Note your starting equipment, assign roles, and head out.
Phase 2: Efficient Looting Tactics
When searching for supplies, target high-yield areas first. Garages attached to suburban homes are highly consistent spawn points for engine fluids like coolant, fuel, and motor oil. Local gas stations and junkyards are also excellent sources; player reports suggest checking the open beds of rusted pickup trucks in junkyards, as they frequently contain spare tires and jacks.
If you find consumables like granola bars or energy drinks, eat or drink them immediately. Consuming them on the spot grants you beneficial status buffs, such as "Energy Frenzy," and frees up your limited inventory slots for heavy repair tools.
[Priority Loot Locations]
  ├── Garages ────────── Coolant, Motor Oil, Fuel Cans
  ├── Junkyards ──────── Tires, Scissor Jacks, Toolboxes
  └── Playgrounds ────── Umbrellas, Consumables, Gadgets
Phase 3: Reading the Storm
Do not let the tornado catch you off guard. The moment you hear the ambient wind noise swell, a storm is making landfall nearby. Stop looting, look at the sky, and determine its trajectory.
If a tornado is bearing down on your position, seek shelter immediately. Bathrooms in suburban homes are the safest structural locations. If you are caught in the open, crouch to activate the "Solid Stance" moodlet, which increases your weight and prevents you from being swept into the sky.
If the tornado passes directly over the van, you will be completely safe—provided both of the van's doors are firmly closed. Keep an ear out for the emergency siren and watch for screen shaking; these effects indicate that an EF5 tornado is within 0.3 miles of your position.
Phase 4: Executing Repairs and Escaping
Once you have secured the necessary tools, carry them back to the van. Remember that replacing complex parts like tires and batteries requires a toolbox in addition to the replacement part itself, as you must first detach the ruined component.
To complete a repair, you must interact with the broken mount and pass a quick-time reaction mini-game. If you are carrying non-essential items, drop them on the ground near the van's exterior to keep your inventory clear for repair tasks. Once the diagnostics screen clears, have all surviving players pile into the van, close the doors, and select "Leave" to secure your victory.
Lobbies and Multiplayer Dynamics
Funnel Runners supports lobbies ranging from a single solo player up to an eight-player crew. The game features an elegant dynamic difficulty system that automatically scales based on your party size.
If you choose to play solo, the game scales down the complexity of the van's mechanical failures, ensuring you do not get overwhelmed by five different cascading problems. However, our Funnel Runners guide highly recommends playing with a group; the map size remains identical regardless of player count, meaning a solo player must cover a massive amount of ground alone. In a larger team, players can divide and conquer: one acts as the dispatcher on the van's radar, two hunt for fluids, and the rest search for heavy machinery.
Frequently Asked Questions
How do you survive an EF5 tornado in Funnel Runners?
To survive a direct hit from an EF5 tornado, you must seek shelter inside a building—preferably a residential bathroom—or get inside the van. If you choose the van, ensure that both the driver and passenger doors are completely closed; otherwise, the wind will pull you out. If caught in the open, crouch immediately to trigger the "Solid Stance" buff to resist the wind's suction.
Can you play Funnel Runners solo?
Yes, you can play solo. The game features dynamic difficulty scaling that reduces the number of simultaneous van problems for solo players. Keep in mind, however, that the map size does not shrink, meaning you will have to run long distances to secure tools and fluids by yourself.
What do the blue and green item highlights mean?
These highlights are visible when using the Pocket Radar gadget (unlocked at Level 50). Blue highlights indicate mission-critical repair items (such as tires, batteries, and fuses) that are required to fix the van. Green highlights indicate general utility items, consumables, and collectibles.
Where can I find more tips beyond this Funnel Runners guide?
For more advanced strategies, community map layouts, and patch updates, check out the official Steam Community Hub or join the game's active player forums. Engaging with other players is the best way to learn advanced co-op strategies and coordinate high-difficulty runs.
Related Guides
Essential Funnel Runners Tips: How to Survive the Tornado Onslaught
Master the storm with our ultimate Funnel Runners tips. Learn how to repair your van, coordinate with friends, and escape natural disasters.
Funnel Runners Beginner Guide: Essential Tips to Survive the Storm and Escape the EF5
Master the chaos of storm chasing with our Funnel Runners beginner guide. Learn to repair the van, manage moodlets, and survive devastating EF5 tornadoes.
Master the Storm: A Comprehensive Guide to Funnel Runners Gameplay and Survival Strategies
Learn how to survive the F5 tornado with our in-depth Funnel Runners gameplay guide. Discover scavenging tips, van repair steps, and co-op tactics.